How to Drain Cheese
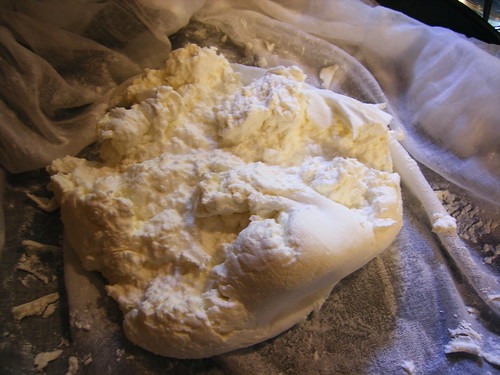
The main steps in making cheese are generally heating the milk followed by cutting the curds and then draining the curds to get rid of the whey. The less moisture in the cheese, the firmer and denser the cheese will be and the longer it can age. If you are making cheese at home, any of these steps can seem daunting, but sometimes the thing we have the most trouble with is the seemingly simple task of setting it up to drain properly.
The most obvious thing to do would be to have a hook in your ceiling over your sink which would allow the whey to flow right down the drain or be captured in a stock pot for another use. However, because of the soffit in my kitchen and the placement of the sink under it, this proved impossible. You may have other limitations. This post is a roundup of some of the devices we have conjured to drain our cheese.
For our huge mozzarella/ricotta/whey day experiment, I came up with the “brilliant” idea to use an old camera tripod. It worked, for sure, but was a little crazy and took up a lot of space.

One day, at the grocery store, I came across this jelly strainer. And I thought that this might work even better and be a little more compact. We used it for draining our cheddar.

It actually worked pretty well. The jelly strainer is essentially a hoop with three legs that screw into it. The legs have a little foot and you can perch it on top of a modest sized stockpot. Bonus is that it is easy to store away.
When we did our goat cheese day and made two batches of fromage blanc, one with fresh goats milk and one from cow, we kind of scrambled around to figure out how to hang them. I don’t think I had the jelly strainer at that time and, anyway, it wouldn’t have worked for two. So, we ended up improvising by hanging the cheese from a broomstick, balanced between a bult-in and a desk. Not pretty, but it worked!

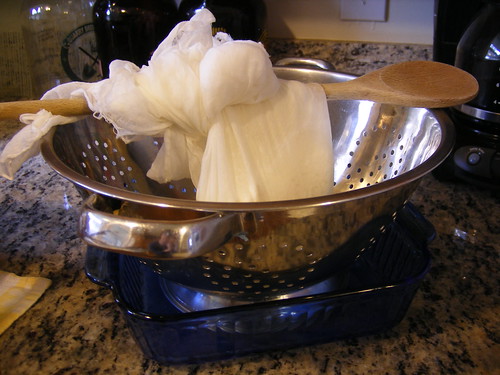
When we made mascarpone, the directions said that we should allow the cheese to drain in the fridge. Hmmm… another conundrum. We ended up with a colander, a wooden spoon and a casserole dish to catch the whey. Really, I could have just balanced it on a stockpot but I couldn’t fit that in my fridge at the time. Any other kind of bowl which will allow the whey to flow away would work as well.
Lastly, if you have the right kind of cabinet handles in your kitchen, you could fashion some kind of hook and hang the cheese from the cupboard handles. Here I’ve used a chopstick to hang the draining cheese over a pot between my closed cupboard handles.

Granted, the drawback here is that you’ve made accessing your cabinet a bit of a pain and, for a small kitchen like my own, I wouldn’t want to give over such prominent counter space for a long draining session. However, if you draining overnight something like this could work in a pinch.
Would love to hear of any inventive ways that you’ve drained your cheese. Just putting this together has inspired in me to once again go looking for a spot where I could hang a hook just for this purpose.
UPDATE! Just saw this post from Urban Cheesecraft for draining cheese using a banana hanger — brilliant!

Claudia from Urban Cheesecraft said,
September 3, 2009 @ 4:50 pm
Ha ha! The banana holder method has been my fave (only good for a gallon, too short otherwise), but all of your ideas are great…I will never look at tripods and brooms the same way again. I love all the crafty photos!
Making Soft Cheese « said,
July 29, 2010 @ 12:03 pm
[…] cheese bundle. Then hang it. There are a lot of ways to do this – I particularly enjoyed the various methods this blogger uses to hang cheese! I personally use kitchen twine to tie off the top of the butter muslin, then form a loop and hang […]
Sally-Page Stuck said,
December 10, 2010 @ 4:21 am
What a great post!!! Very informative with great photos.